How to burn or update Bootloader in Arduino IDE
Why is this needed?
Such a need may arise when you need to flash the bootloader onto a new microchip to make it Arduino-compatible or when you need to update the bootloader, for example, to fix an EEPROM reading error through Avrdude.
What is a bootloader?
Microcontrollers are typically programmed using a separate device, a programmer, unless the microcontroller comes with pre-installed firmware that allows loading new firmware without the need for an external programmer. This is what we refer to as a bootloader. Unfortunately, to load the bootloader itself, just an Arduino is not sufficient. For this, you will need either another Arduino or an external programmer, such as a USBasp.
How does the bootloader work?
Immediately after power-up or reset, the bootloader waits for the arrival of a new main program. This process takes very little time, typically less than one second.
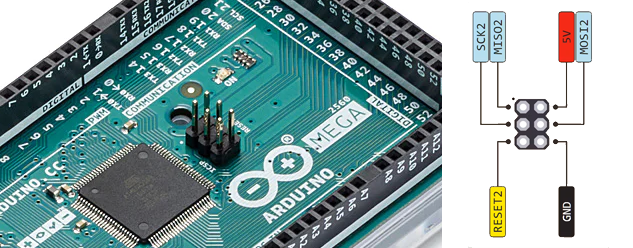
To write a new program or bootloader to the microcontroller using an external programmer on Arduino boards, the ICSP (In-Circuit Serial Programming) connector is used.
This is what the ICSP connector looks like on the Arduino Mega board.
Burning the Bootloader
Let’s take a closer look at the process of writing the bootloader to an Arduino Mega using an Arduino Uno as an external programmer in the Arduino IDE.
When writing the bootloader to the Arduino Mega 2560 using the Arduino IDE, the IDE will use the bootloader located at this path (which may vary).
C:\Users\user\AppData\Local\Arduino15\packages\arduino\hardware\avr\1.8.6\bootloaders\stk500v2
And the actual file is named “stk500boot_v2_mega2560.hex“
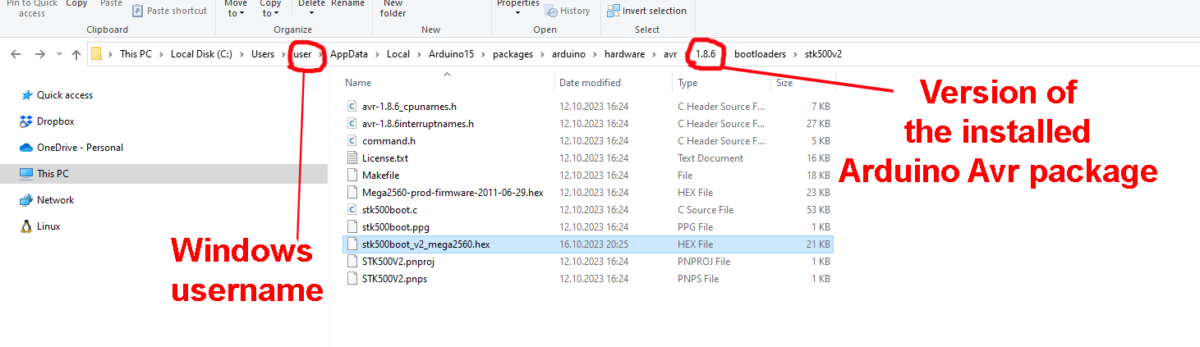
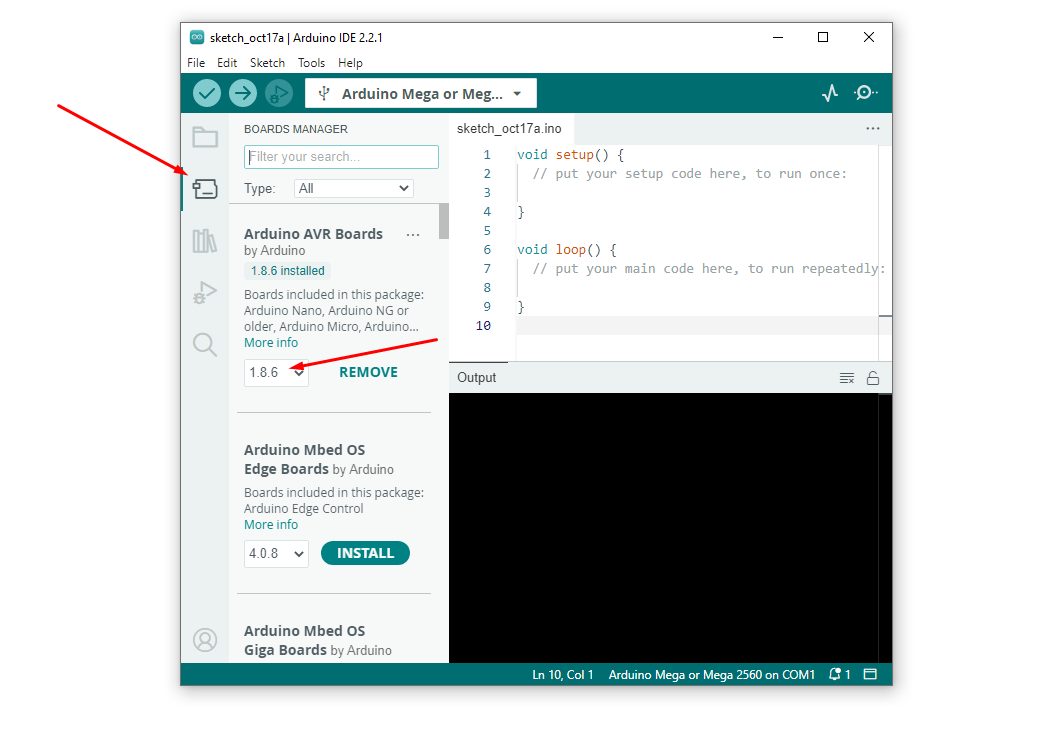
This path is not constant and will depend on the Windows user’s name (in this case, “user“) and the version of the installed “Arduino AVR Boards” package in the Arduino IDE (in this case, “1.8.6“).
If you want to flash a non-standard bootloader, you will need to replace this file with the bootloader you intend to flash. For example, you can download a bootloader for the Arduino Mega 2560 at this link:
Fixed bootloader for Arduino Mega 2560 (552 downloads)
, which has the EEPROM reading via USB fixed, allowing you to save the entire EEPROM memory to a file on your computer. Usually, EEPROM stores settings that are retained even when the device’s power is reset.
0. Install Arduino IDE from the official arduino website if you haven’t done so already.
1. Open Arduino IDE.
2. Connect the Arduino Uno board to the computer.
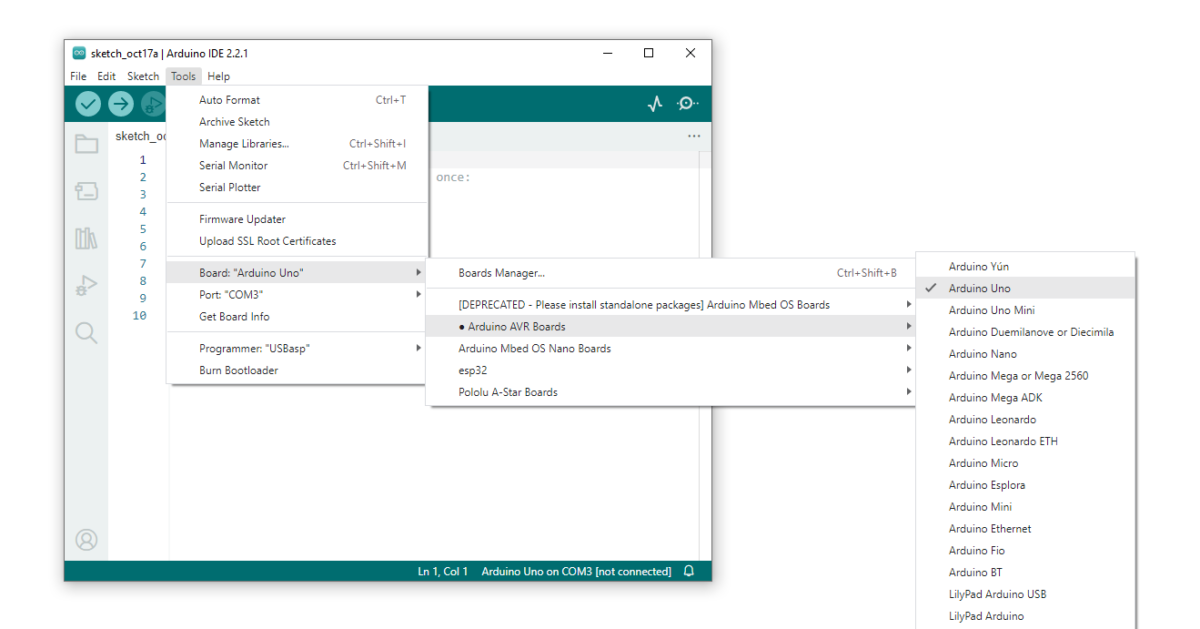
3. Select the Arduino Uno board: Tools > Board > Arduino AVR Boards > Arduino Uno.
4. Select the COM port to which the Arduino Uno is connected: Tools > Port > COMx (Arduino Uno)
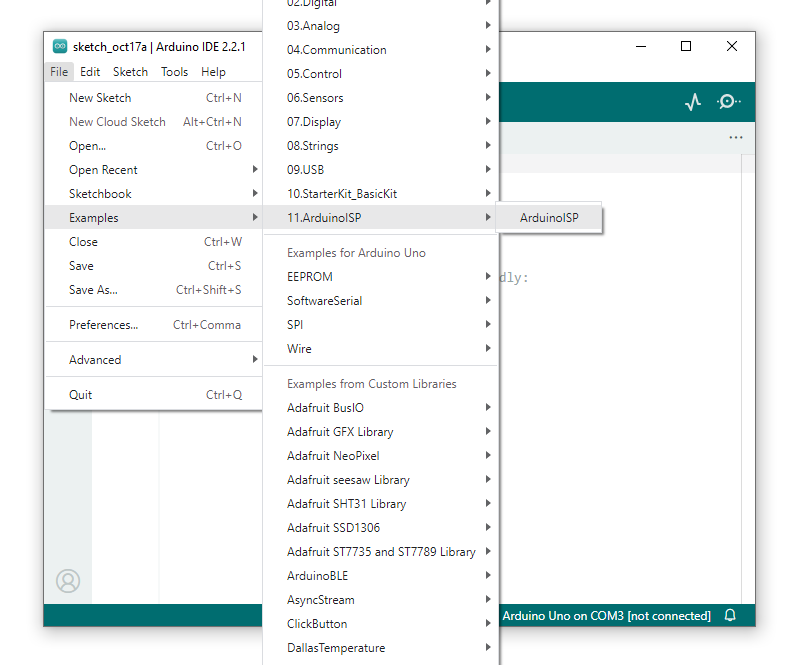
5. Upload the “ArduinoISP” sketch to the Arduino Uno, which contains the programmer functionality: Open File > Examples > 11.ArduinoISP > ArduinoISP.
6. Click Upload button to upload the sketch to the Arduino UNO board.
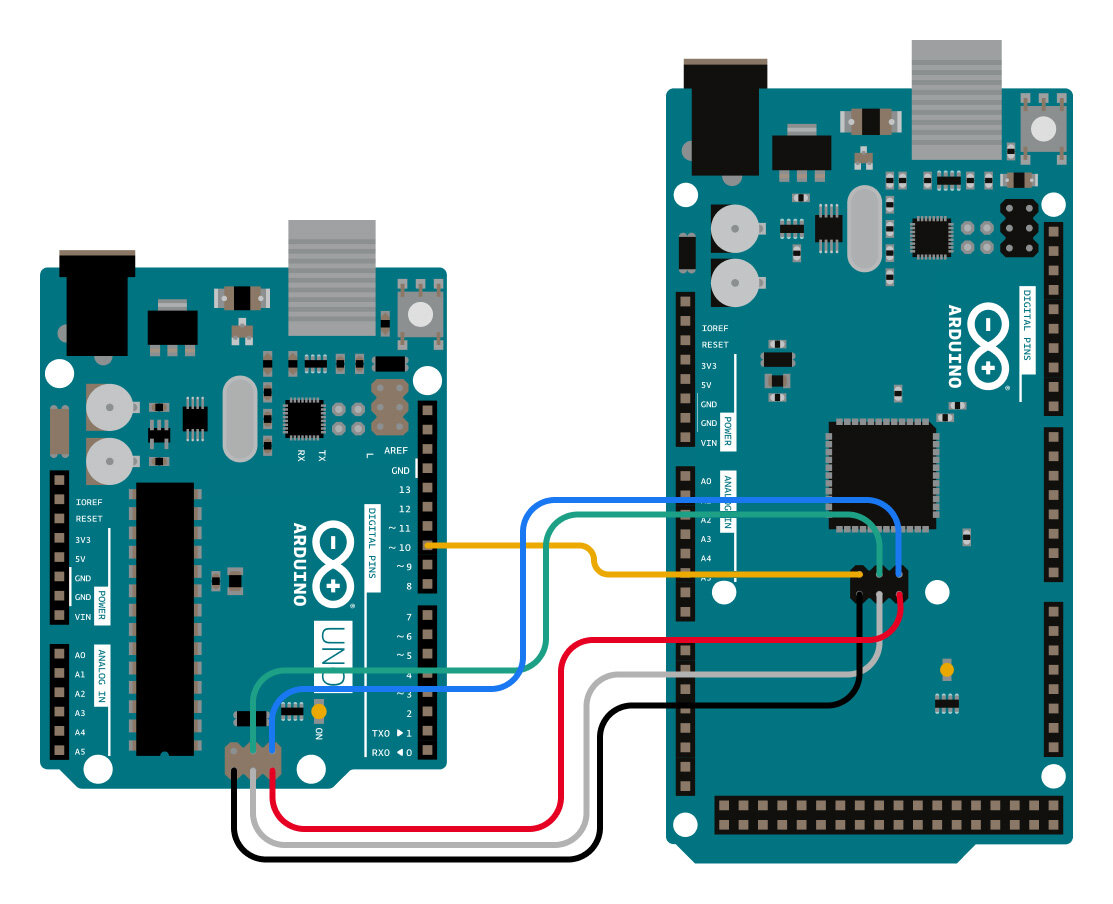
7. Now, you need to connect both boards as shown in the diagram:
a) Connect every Arduino UNO ICSP pin except RESET to the equivalent ICSP pin on the Arduino Mega.
b) Connect PIN 10 on the Arduino UNO board to RESET pin on the Arduino Mega.
8. Select the Arduino Mega 2560 board: Tools > Board > Arduino AVR Boards > Arduino Mega 2560.
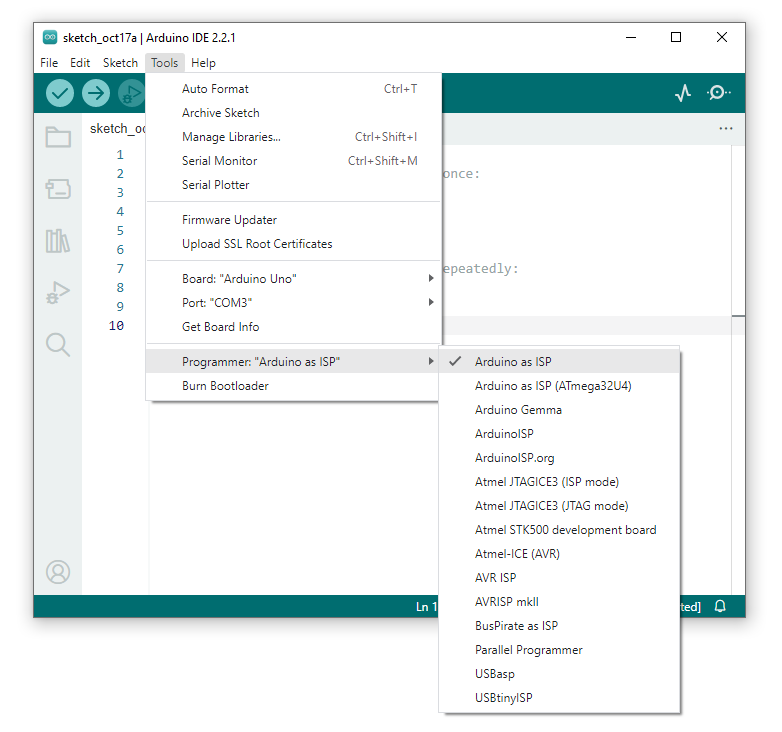
9. Select the programmer named “Arduino as ISP“: Tools > Programmer > Arduino as ISP. If you were using a different programmer, such as USBasp, at this step, you would need to select USBasp specifically
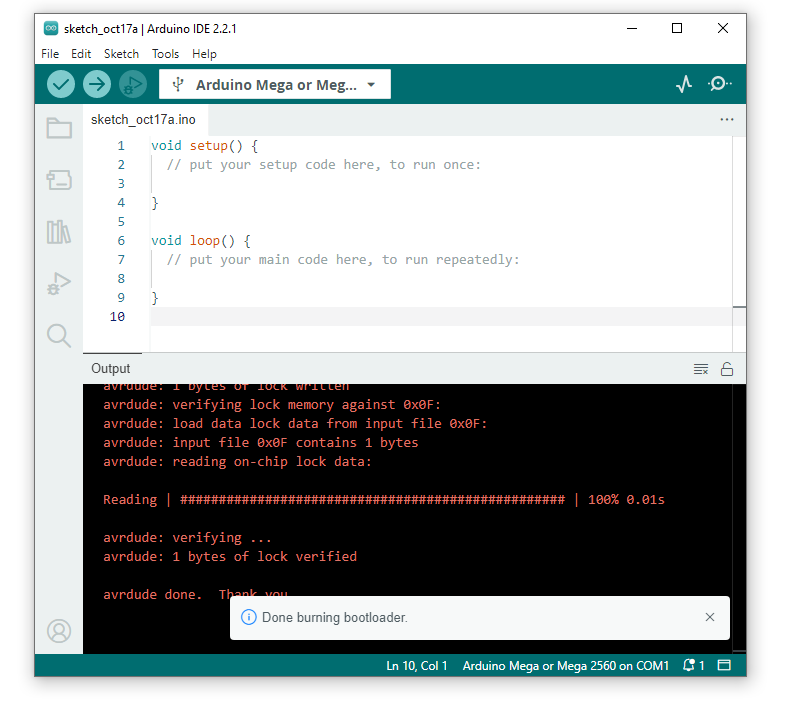
10. And finally, the last step: select Tools > Burn Bootloader.
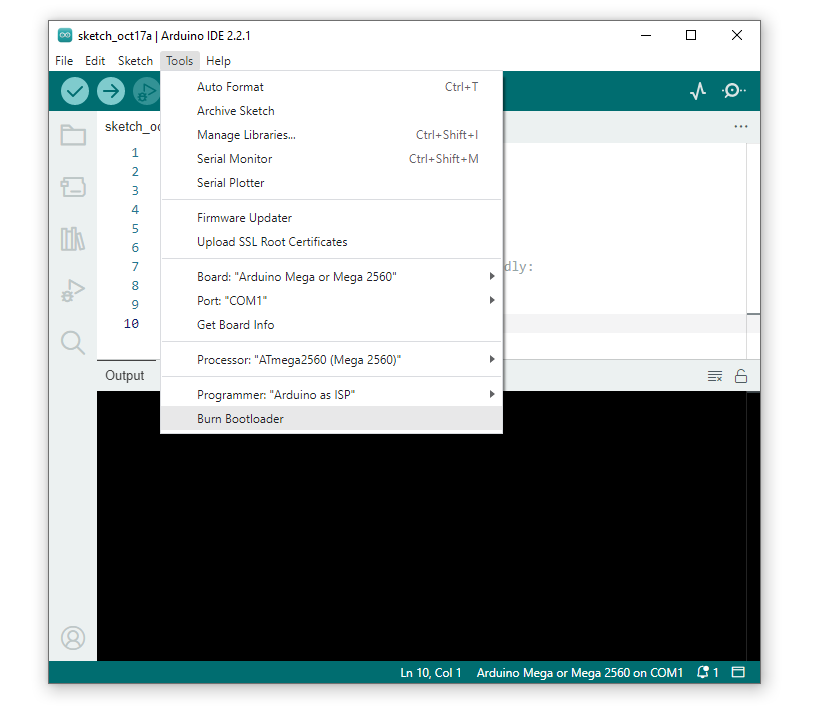
If everything has been done correctly, you will see the message: “Done burning bootloader“